Creating paper strip Christmas tree cards is a fun and simple DIY craft idea for the holiday season! Here’s a step-by-step guide to making your own:
Materials Needed:

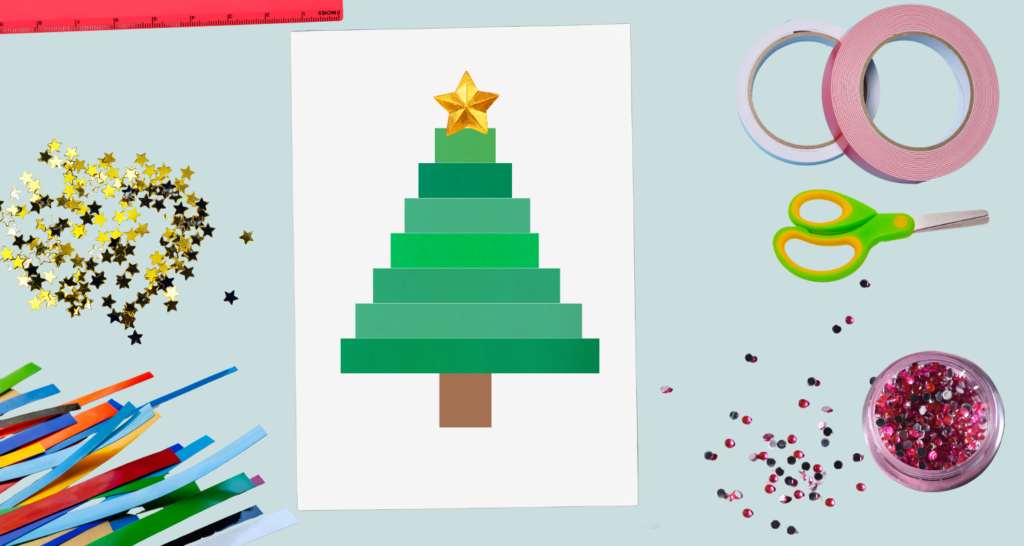
- Green, brown, and colorful paper strips (construction paper or cardstock works well)
- Scissors
- Glue or double-sided tape
- A blank card or thick paper for the base
- Small embellishments like star stickers, rhinestones, sequins, or buttons for decoration
- A ruler (optional, for even strips)
Instructions:
Step 1: Cut the Paper Strips
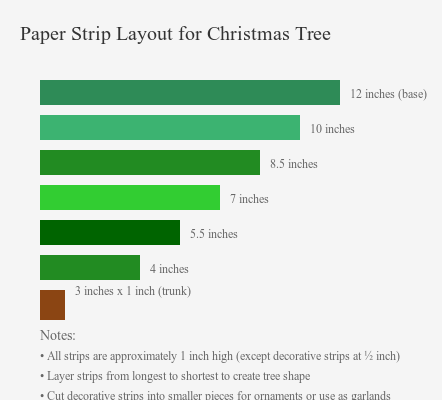
- Green Strips: Cut several green strips of paper. Vary the lengths from long to short to create the tiers of the Christmas tree. Typically, the longest strips will form the base, and each layer will get progressively shorter as you move upwards.
- Brown Strip: Cut a small brown strip for the tree trunk, approximately 1 inch wide and 3 inches long (you can adjust this based on your card size).
- Decorative Strips: You can use colorful paper for additional decoration (for garlands, ornaments, or even the tree trunk base).
Step 2: Assemble the Tree
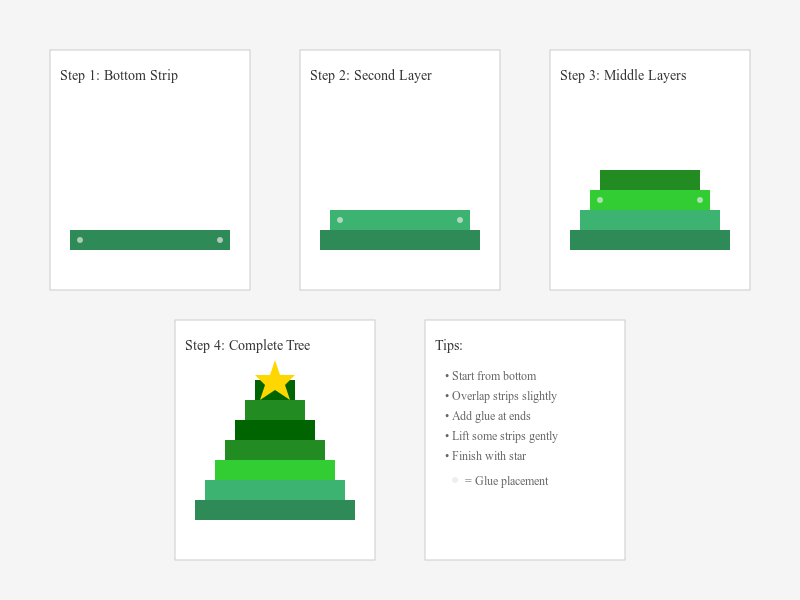
- Start at the bottom of your card and glue the longest green strip horizontally, creating the widest part of the tree.
- Layer shorter green strips on top, gluing them in a triangular shape as you move upwards, with each strip slightly overlapping the one below it.
- Continue layering until you reach the top of the tree.
Step 3: Add the Tree Trunk
- At the bottom of the tree, glue the brown strip vertically to form the tree trunk.
Step 4: Decorate the Tree
- Use your colorful paper strips to create garlands across the tree, or add small decorative items such as sequins or rhinestones to serve as ornaments.
- You can also glue a small star or a decorative element at the top of the tree.
Step 5: Final Touches
- Once everything is glued in place and dry, write a holiday greeting inside the card, such as “Merry Christmas” or “Happy Holidays.”
- Optionally, you can add some extra sparkle with glitter or a festive ribbon around the card’s border.
Step 6: Allow the Glue to Dry
- Let your card dry completely before gifting it to someone. This guarantees that all elements are firmly secured.
Additional Tips:
- Customization: You can make the tree look even more unique by adding more layers or cutting the paper strips into different shapes (e.g., zigzag for tinsel or leaves).
- Personalization: Write a personalized note inside the card, or have children decorate their tree with different shapes and sizes of paper cutouts.
This DIY craft makes a wonderful, personalized card for the holidays, and it’s a great way to involve kids in the festive spirit!
Creating nature-inspired Christmas cards is a wonderful way to bring an earthy, rustic feel to holiday greetings. Here’s a guide to making simple, beautiful, nature-themed cards.
Materials Needed:
- Blank cards or cardstock paper
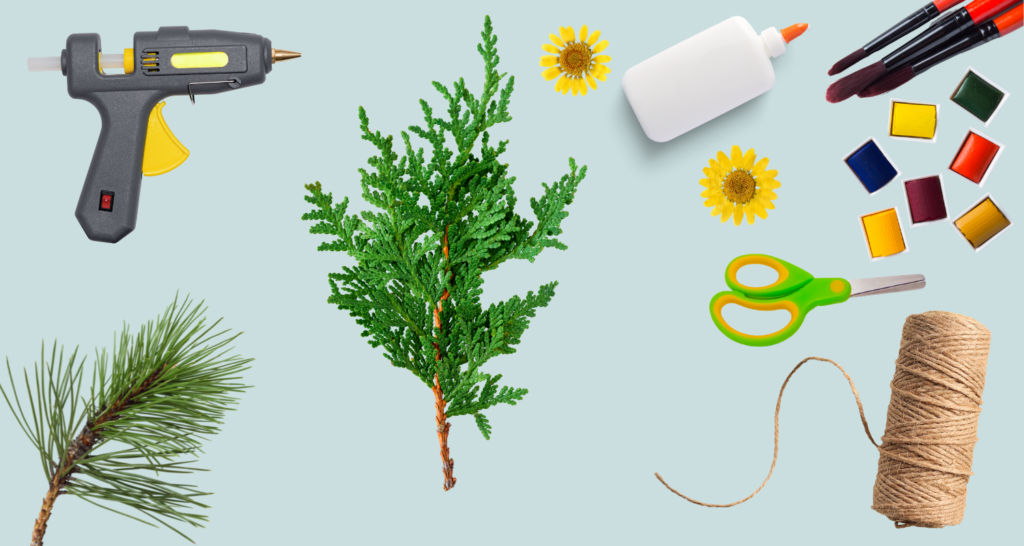
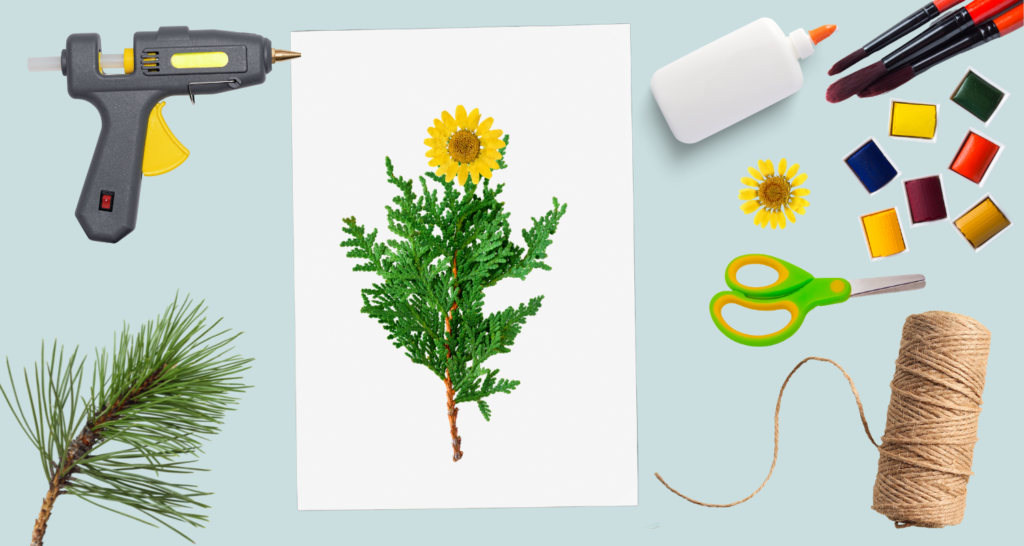
- Natural elements: pine needles, small pinecones, twigs, dried leaves, or pressed flowers
- Twine or jute string
- Glue or hot glue gun (for heavier items like pinecones)
- Scissors
- Small paintbrush (optional for detail)
- White or metallic gel pens for writing
- Optional: watercolor or acrylic paints in muted tones
Instructions:
Step 1: Collect and Prepare Natural Elements
- Go for a walk and collect natural items like small twigs, pinecones, pine needles, and dried leaves. Make sure everything is clean and dry before using it on the card.
- If you want a pressed look, you can press the leaves and small flowers in a heavy book for a few days before crafting.
Step 2: Plan Your Design
- Think of simple nature-themed shapes, like a tree, wreath, or winter bouquet, and arrange the items on the card without gluing. This gives you a sense of how the final design will look.
Step 3: Assemble the Card
- Tree Design:
- Use twigs or pine needles to create a tree shape on the front of the card. Start with a sturdy twig as the trunk, then glue pine needles or smaller twigs in a triangular shape above it to resemble a tree. Add a small, dried leaf or pressed flower as a “star” on top.
- Wreath Design:
- Arrange a small circle using pine needles or twine. Secure the ends to create a wreath shape, then glue it onto the card. Add tiny pressed flowers or berries for decoration around the wreath.
- Nature Bouquet:
- Bundle small twigs, leaves, and flowers with twine. Tie them together like a small bouquet, and glue the bundle to the center or corner of the card.
Step 4: Add Finishing Touches
- Use white or metallic pens to add small details like snowflakes, stars, or a handwritten holiday greeting.
- If you like, use a bit of watercolor or acrylic paint to add subtle background colors, like a light wash behind a tree or wreath.
Step 5: Let it Dry
- Make sure everything is securely glued and allow it to dry completely before handling or gifting the card.
Additional Tips:
- Simplicity: Keep the designs simple to let the natural elements shine.
- Personalization: Write a personal message inside for an extra-special touch.
- Eco-Friendly: Use recycled or eco-friendly paper to make these cards truly nature-inspired.
These nature-inspired Christmas cards bring a touch of the outdoors into the holiday season and make unique, heartfelt greetings.

